Category Archives: Featured

Why self-diagnosis of Celiac Disease and gluten intolerance is so common

And why you should probably give the benefit of the doubt

In a discussion at Reddit, someone pointed out that wheat allergies are actually rather rare, and suggested that most people who claim gluten problems are just making things up.

This is my response, or why self diagnosis is so common and why there is probably merit to those conclusions:

Technically, wheat allergy is relatively rare compared to Celiac Disease and non-Celiac gluten sensitivities. Allergy is an acute IgE reaction, Celiac and non-CD sensitivities tend to be mediated by the slower acting IgG and/or IgA antibodies. However, that is a lot of technical stuff to explain to your server, so it is usually a lot more convenient for gluten sensitive individuals to just say they’re allergic. “Intolerant” doesn’t quite carry the importance of gluten sensitivities, because there is a strong and direct correlation between gluten consumption in sensitive individuals and all-cause mortality. That hasn’t been established so clearly with other types of “intolerance” originating from different mechanisms (ie, lactose intolerance)

Anyway, we can diagnose CD with intestinal biopsy, and we can diagnose non-CD sensitivities with blood serum tests. HOWEVER: Once someone has been on a gluten-free diet for a significant amount of time, the intestines heal and the blood serum drops to healthy levels. So you just can’t test someone for gluten reactions if they’re already on a gluten-free diet. It isn’t instant like an allergy, and it could take months or years of gluten consumption to build up the diagnostic markers our tests are looking for.

The puzzled doctor - a familar image to the gluten intolerant

Ultimately though, I see no reason why anyone would choose to adhere to such a restrictive and difficult diet unless they feel a significant subjective improvement. Instead, it is extremely common to hear stories from people who were diagnosed but choose to ignore their doctors’ dietary advice. Even with full knowledge of the disease, maintaining the diet is an extreme act of mental fortitude.

Self-diagnosis is an interesting… problem. American doctors are notoriously bad at detecting Celiac Disease. Many were taught that it is extremely rare and only effects children. Based on what we know from random blood sampling, about 1% of the population has Celiac Disease and only 5% of them have received a “real” diagnosis from a doctor. Non-Celiac gluten sensitivity is 5-10 times more common than Celiac, yet almost 0% of those patients will ever get an official diagnosis beyond IBS or CFS. An elimination diet can be conducted in a relatively scientific manner, but the data is highly subjective.

Granted, the gluten-free diet may act as a placebo in some cases. Anything could be a placebo, though, so why would anyone choose such a difficult placebo over cheaper and more convenient ones?

Happy Gluten Free Holidays

With Thanksgiving a recent memory, Christmas will be upon us soon – and that means a season of food and potentially tough times for Celiacs and anyone on a gluten-free diet.

Luckily, knowledge of the condition and appropriate products are spreading like wildfire.  We attended a few Thanksgiving meals in the last few weeks, and at each one I was able to find some appropriate grub.  With a six- or twelve-pack of Woodchucks in hand, I’d even have some drinks to keep up with the college kids.

For our actual Thanksgiving meal, we had some beef ribs marinated in Stubb’s regular BBQ sauce.  I also cooked up some green beans with bacon and red bell pepper, grean peas with minced onion and garlic, as well as Colcannon – an Irish dish so nice they made a song about it.

Ok, so the song might be about a little bit more than just the potatoes, but they still taste pretty great.

First you cook potatoes, fry up some bacon or ham, boil up some kale, and heat a bit of milk and cream with scallions. Drain the kale well and chop it finely before mixing the whole thing up, and serve it with a bit of melted butter in an indentation at the top of a potato hill.

Anyway, we had some gluten-free muffins on hand but there wasn’t much talk of dessert. We pretty much ate the main course until we were ready to pass out for the holiday nap.

On that front, my fiancee has been baking quite a bit in our new, gluten-free kitchen. Since we don’t have any wheat products in the house, she’s been craving some breads and pies so in the last few weeks there have been some very interesting and delicious experiments in biscuits, apple pie, and banana-nut muffins.

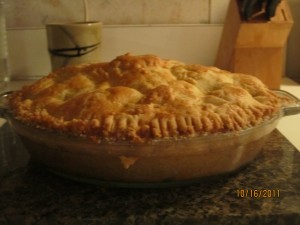
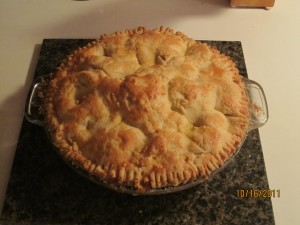
The recipes are definitely in an experimental phase or else I’d share them, but for now I can at least post some pictures of that delicious gluten free applie pie we enjoyed last month:

The taste was spot on, but the texture of the crust was a bit too crumbly and it didn’t hold up well with cutting. Hopefully we get that figured out before too long and I’ve got some tips to share about overcoming that little defect of the gluten-free flours.

Until then, here’s hoping that you and your loved ones have a happy, and gluten-free holiday season!

Marinated Shark Steaks

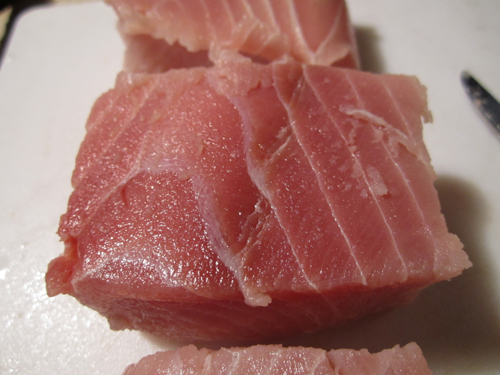
I don’t cook a whole lot of sea food, but I am always looking to try new things.  So after a fairly successful attempt at salmon, I headed back to the sea food counter at the local grocery.  The man behind the case mentioned some shark steaks, and they looked so lean and meaty that I couldn’t resist.

Just look at that!  The shark steak is pure muscle, so I started thinking that they would probably need some kind of marinade to prevent drying out.  There isn’t any kind of significant fat coming from the shark itself, so oil is going to be the major ingredient in that.

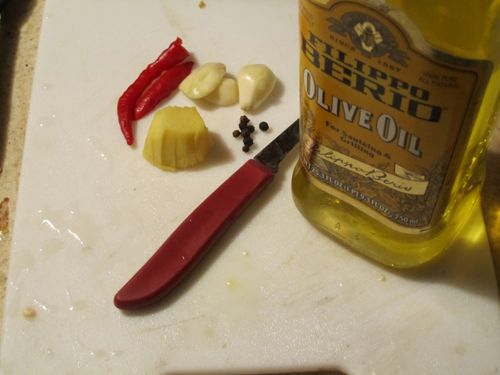
Basically:  a dozen black peppercorns, a small red cayenne pepper (carefully de-seeded!), three cloves of garlic, and about a big spoon of ginger.

Will it blend?  Absolutely! It took a bit of coaxing but I finally got a fairly consistent oil that smelled great.  From there, I bagged up the shark steaks and poured this mix all over.  After letting it sit in the fridge for another three of four hours, they were ready for the broiler.  Cooked at about 12 minutes per side, they were a nice combination of tenderness, solid protein, and a subtle but distinct flavor that is only vaguely reminiscent of fish and other sea steaks.

It actually turned out very well with the olive oil, but I’m sure you could use just about any veggie oil, from a more neutral peanut to a more dominant sesame.  I’d personally prefer to stay away from the canola, as the most accurate description of the taste profile that I’ve heard is “a metal trying to be a fish.”

Unfortunately, I seem to have forgotten to get any pictures of the shark steaks after cooking.  We were in a big hurry to eat them actually, because the entire house was quickly filled up with a delicious aroma that was as inviting as it was new.

This particular meal was served with some rice and sesame oil, as well as some steamed snow peas.  For drinks, a blush wine seemed to hit the spot just right.

What is a typical gluten free meal?

There’s a lot of confusion about gluten free diets and meals, and some might be asking:  What is a “typical” gluten free meal?

Well first of all, just because one can’t eat wheat doesn’t mean there aren’t still thousands of other ingredients and combinations available!  In that sense, it could be almost impossible to declare a typical or normal meal, but I can at least show you what kind of dinner is fairly typical for myself when I don’t particularly feel like cooking anything that takes effort.

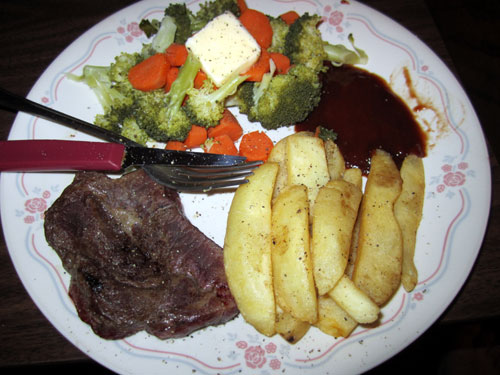
A gluten free meal of steak, fried potato, and steamed vegetables

Nothing too fancy here, just the basics:  A small piece of flat iron steak, a few steak fries (Ore Ida), and a carrot steamed with a head of broccoli.  There’s a pretty nice slice of butter sitting on the vegetables, a bit of Cattleman’s Classic BBQ sauce (also gluten free), as well as a little salt and a whole lot of freshly cracked pepper on top of everything.

As you can see, this isn’t terrible different from a typical meal for anyone, whether or not they’re intolerant of wheat protein.

Cooking a gluten free meal can be easy

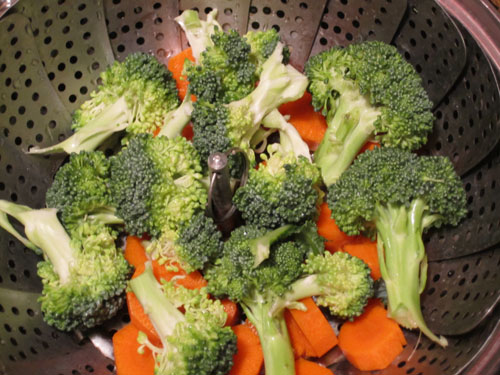
For this meal, there really aren’t that many steps.  First of all, peel and slice the carrots then break up a head of broccoli in to the steamer pot with them.  Wash it up, cover the lid, and then just let it sit on a low to medium heat while the other stuff cooks.

Carrots and broccoli in a steaming pot

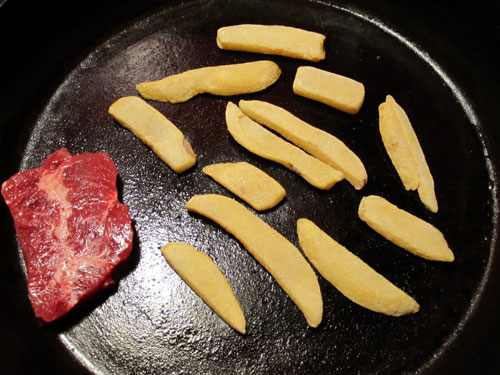
For the steak and fries, just lightly cover the surface of a frying pan with some peanut oil, then cook for about 10 to 15 minutes on each side at a medium temperature.

A flat iron steak and steak fries in a frying pan

Once it is cooked, season and enjoy!  The vegetables are great with just a bit of butter and salt, and as you can see from the first picture I just love to put black pepper on everything!

Total prep time is about 5 minutes or less, and total cooking time is about 30 minutes or just a little bit less.

So next time you find yourself trying to cook a gluten free meal, don’t despair!  Just make sure the cooking surfaces are clean from any potential cross contamination, and try a recipe that doesn’t stray too far from fresh ingredients.

Gluten Free Pizza Recipe – Made Cheap, from Scratch

I haven’t had much time to post anything, but I’m starting to really make some progress on the pizza front and I wanted to share the recipe of this handmade gluten-free pizza that I’ve been stuffing myself with for the last month or so:
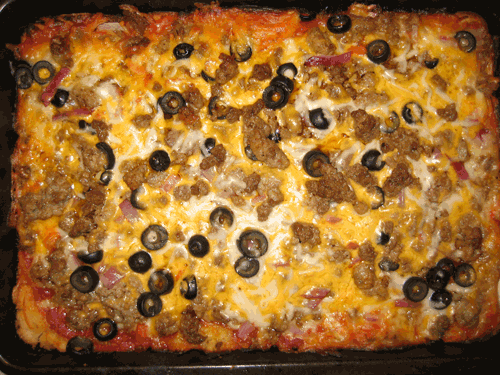
It wasn’t too hard for me to drop most gluten-containing foods or find substitutes, but pizza had always been a particular problem.  Even when ready-made pizzas were available from the frozen food section or Tommy’s Pizza on Southside, they were typically pretty small compared to my appetite (and my budget!)  I knew that if I was going to be able to afford to keep eating gluten free pizza, I was going to have to find a way to make it a lot cheaper.  And while this isn’t quite rice and beans cheap, its quite affordable when you consider how many meals it can provide.

Now let’s get to the good stuff, something like that deep dish incarnation of the gluten-free pizza:

Ingredients

Gluten Free Pizza Crust

  • 1.25 cups White sorghum flour
  • .75 cups Whole grain brown rice flour
  • .25 cups Corn starch
  • 8 ounces Milk
  • 1 tbsp Sugar
  • 1 ounce (1 package) Dry yeast
  • 2 tbsp distilled vinegar
  • Garlic, pepper, oregano as preferred
  • Oil for greasing the pan and hands

Gluten Free Pizza Sauce

  • 16 oz (1 can) crushed or diced tomato
  • 6 oz (1 can) tomato paste
  • Oregano, garlic, pepper, salt, basil, and/or sage as preferred

Gluten Free Pizza Toppings

  • 1/2 lb ground beef
  • 1/2 lb ground sausage
  • 1/3 onion
  • 1/3 bell pepper
  • 6 oz mild cheddar cheese
  • 6 oz mozzarella cheese
  • 1/2 small can olives
  • 1/4 jar mushrooms

Ok, the first thing is to make sure you’ve got some space for everything.  You’ll need a medium pot for warming up the sauce, and you’ll need a large frying pan to brown up all the beef and pork.  The pizza dough is particularly space consuming:  Its not just the large mixing bowl, but you’ll also need somewhere to roll it on additional flour.  Once the dough is ready, you’ll also need a greased up surface to put it on – whether this is a brownie pan like my deep dish style, or a more professional pizza stone, or even right on a cookie sheet or square of tin foil.

Cooking the Pizza

Sauces and meats go first

Preheat the oven to 400 degrees…

Start the sauce up by pouring the crushed tomatoes and paste into the medium pot over low or medium heat.  Stir in some oregano, garlic, basil, or pepper if you’re so inclined.  Vinegar and pepper style hotsauce in the mix is also a great choice if you like a pizza with kick, but don’t let me or any other person tell you how pizza sauce should taste like.  After a few attempts, you’ll know what needs to be tweaked for your own preferences.

When the sauce is stirred up and simmering, start up the beef and sausage on a bit higher heat.  If you’re buying the really cheap ground meats, you’ll have to drain the pan a few times in this process.  I don’t mind fat, but you should try to at least keep them dry enough so that they can brown a bit. So, every few minutes until the beef is completely cooked, continue to chop it up on the pan with like a plastic spatula.  Basically, keep the pieces small and sort of dry.

What’s actually really important, is to not add any salt to the meats until they’re already cooked through.  I read a very good experiment on this at Reddit and my own experiences confirm it – so you’ll have to trust me here or ask someone who saved it to post the link.  Don’t forget though, no hotsauce on the beef & sausage until they’re already browned!

Making the pizza dough

Pour the 2 1/4 cups of flour and starch into a big mixing bowl.  I usually also add in some fairly generous amounts of garlic, salt, (red) pepper, and oregano.  Not a whole lot, but just enough to put some coloration and flavor in between the otherwise whitish flours.

Now pour a cup of milk (8oz) into a large coffee mug or something you can heat up in the microwave for a little bit less than a minute.  When the milk is warm (not hot!), stir in the spoonful of sugar and the package of yeast.  In a short while you’ll see some bubbles popping up and that is when you can add the milky mix and two tablespoons of distilled vinegar to your flour and spices mixture.

Stir this up as good as you can, making sure to pick up the flour at the bottom of the bowl often and get as much as you can into the ball of dough.  If you let too much flour sit dry, the mix will be too slimy to work with, so the ratios are pretty important to keep constant here.  Try to not spill or leave flour dry, it can be hard to try to add stuff later as compensation.

Now, you do need to put some dry flour on a dry non-stick surface (like a plate or aluminum foil).  Don’t get this wet, and put it off to the side for now.  A little later you’ll need this for the dough, and by that point your hands are going to be too greasy to work with dry flour.

At this point, you’re definitely going to get greasy.  In fact, that’s the secret to this whole procedure.  Before you touch that gooey mix of gluten free pizza dough, you need to literally coat your hands in some kind of cooking oil.  Olive oil is too powerful of a flavor (and too expensive) so I’m using a much cheaper blend of various oils from SmartChoice right now.  Basically, the cheapest big bottle that wasn’t pure canola.

In addition to your hands, you’ll also want to grease up a pan or pizza sheet.  Drop a bit of oil right on to the cooking surface and use a napkin or paper towel to spread it around evenly.  You don’t want any puddles to develop, but you do have to make sure that a complete layer is over the entire surface.

Now that your hands and pans are really greasy, you can finally pick up the pizza dough and start to play with it.  Don’t grab it directly, but try to pour it out into your hand and lightly guide it into the shape of a ball.  Whatever you do, don’t put a lot of force into it or let it sit on one part of your hands for too long!  Move it around a bit, throw it from one hand to the other.  Its not going to disc out like a glutenous pizza dough, but you can get a pretty good sphere going if you keep it moving.

Once you’ve got a dough ball, dust the exterior with some of that dry flour you set aside earlier.  (I hope you remembered to do that before getting everything greasy!)  Roll the dough over the dry flour – just enough to get a light inactive layer on the outside of the soon-to-be crust.

Now you’ve got a gluten free pizza crust you can really work with.  Either lay it across the bottom of a brownie pan like I typically do, or just shape it around like a circle, or whatever.  Just remember to pinch the dough at the edges a little bit and the yeast will take care of the rest of the rising effect.

Pizza Toppings

At this point in time the crust is ready, the sauce is cooked, and the beef & sausage mixture is probably smelling delicious.  Because of this situation, the actual toppings that go on the pizza are as much a matter of patience as they are preference.

Chopping is a pain, but really small onions and peppers will really pay off in the taste experience.  Its best to keep these under the cheese while cooking, so you can stir them into the sauce or put them on top immediately after you spoon the tomato sauce on to the crust.  Mushrooms and olives are a bit more heat resistant, so they can be mixed in to the cheese or placed on top with the beef.  Of course, if there is a lot of beef and sausage, you might need to put some of it under the cheese as well.  Luckily, the deep dish pizza can tolerate a whole lot of delicious toppings!

Once you shape the dough, spoon the sauce on top, add the onions, peppers, cheese, mushrooms, beef, and/or olives (in that order), all that’s left to do is pop the pizza in to your preheated (400 degrees!) oven for about 30 or 35 minutes depending on depth.

Then:
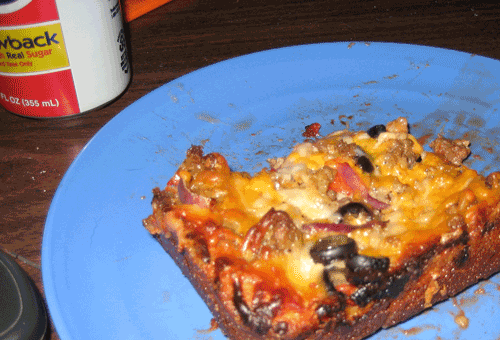
Even though we didn’t stire any oil directly to the crust mixture, its still a pretty greasy and messy product when you consider the greasy hands and pans that held it!  Yummm…

Of course, its absolutely delicious as well, and it delivers 10-12 slices like the one in the picture above.  I wouldn’t call that a “light” meal, but its definitely pretty filling without going to the point of feeling overstuffed.

Price:

The flour is about $2.50, the meats are about $2.50, the veggies are another $2-3, and the sauce costs about $1.25.  All together, this is a pretty big pizza for around $10.

Preparing a crust can take anywhere from five minutes to thirty – and it seems to get easier over time unless you’re trying to make different textures or make due with an imperfect selection of ingredients.

All together, the whole thing can be prepared in thirty minutes and cooked in another thirty.  Once I realized that I was never more than one hour from a fresh pizza, I haven’t really been able to eat anything else…

Be warned… then eat up and enjoy!