Category Archives: Food

Marinated Shark Steaks

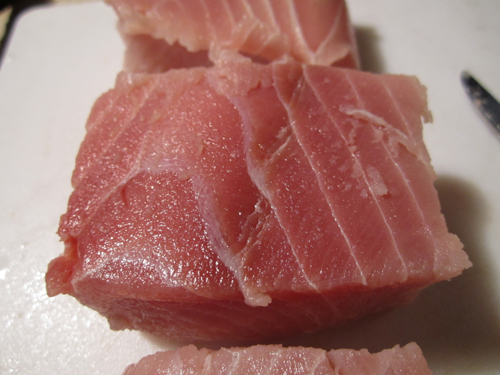
I don’t cook a whole lot of sea food, but I am always looking to try new things.  So after a fairly successful attempt at salmon, I headed back to the sea food counter at the local grocery.  The man behind the case mentioned some shark steaks, and they looked so lean and meaty that I couldn’t resist.

Just look at that!  The shark steak is pure muscle, so I started thinking that they would probably need some kind of marinade to prevent drying out.  There isn’t any kind of significant fat coming from the shark itself, so oil is going to be the major ingredient in that.

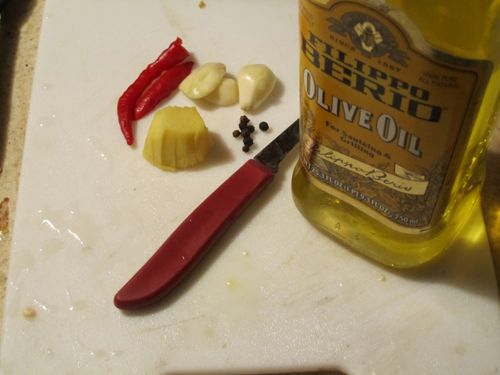
Basically:  a dozen black peppercorns, a small red cayenne pepper (carefully de-seeded!), three cloves of garlic, and about a big spoon of ginger.

Will it blend?  Absolutely! It took a bit of coaxing but I finally got a fairly consistent oil that smelled great.  From there, I bagged up the shark steaks and poured this mix all over.  After letting it sit in the fridge for another three of four hours, they were ready for the broiler.  Cooked at about 12 minutes per side, they were a nice combination of tenderness, solid protein, and a subtle but distinct flavor that is only vaguely reminiscent of fish and other sea steaks.

It actually turned out very well with the olive oil, but I’m sure you could use just about any veggie oil, from a more neutral peanut to a more dominant sesame.  I’d personally prefer to stay away from the canola, as the most accurate description of the taste profile that I’ve heard is “a metal trying to be a fish.”

Unfortunately, I seem to have forgotten to get any pictures of the shark steaks after cooking.  We were in a big hurry to eat them actually, because the entire house was quickly filled up with a delicious aroma that was as inviting as it was new.

This particular meal was served with some rice and sesame oil, as well as some steamed snow peas.  For drinks, a blush wine seemed to hit the spot just right.
What is a typical gluten free meal?

There’s a lot of confusion about gluten free diets and meals, and some might be asking:  What is a “typical” gluten free meal?

Well first of all, just because one can’t eat wheat doesn’t mean there aren’t still thousands of other ingredients and combinations available!  In that sense, it could be almost impossible to declare a typical or normal meal, but I can at least show you what kind of dinner is fairly typical for myself when I don’t particularly feel like cooking anything that takes effort.

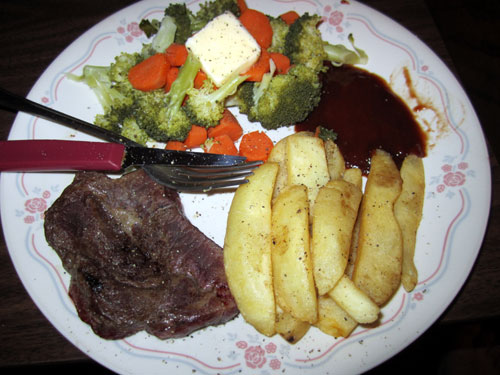
A gluten free meal of steak, fried potato, and steamed vegetables

Nothing too fancy here, just the basics:  A small piece of flat iron steak, a few steak fries (Ore Ida), and a carrot steamed with a head of broccoli.  There’s a pretty nice slice of butter sitting on the vegetables, a bit of Cattleman’s Classic BBQ sauce (also gluten free), as well as a little salt and a whole lot of freshly cracked pepper on top of everything.

As you can see, this isn’t terrible different from a typical meal for anyone, whether or not they’re intolerant of wheat protein.

Cooking a gluten free meal can be easy

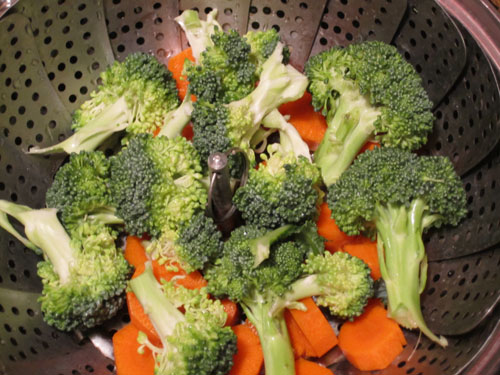
For this meal, there really aren’t that many steps.  First of all, peel and slice the carrots then break up a head of broccoli in to the steamer pot with them.  Wash it up, cover the lid, and then just let it sit on a low to medium heat while the other stuff cooks.

Carrots and broccoli in a steaming pot

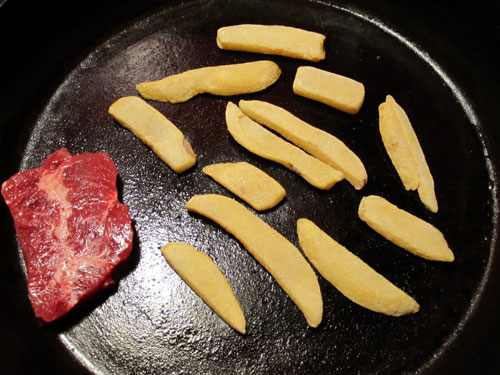
For the steak and fries, just lightly cover the surface of a frying pan with some peanut oil, then cook for about 10 to 15 minutes on each side at a medium temperature.

A flat iron steak and steak fries in a frying pan

Once it is cooked, season and enjoy!  The vegetables are great with just a bit of butter and salt, and as you can see from the first picture I just love to put black pepper on everything!

Total prep time is about 5 minutes or less, and total cooking time is about 30 minutes or just a little bit less.

So next time you find yourself trying to cook a gluten free meal, don’t despair!  Just make sure the cooking surfaces are clean from any potential cross contamination, and try a recipe that doesn’t stray too far from fresh ingredients.

Prepared horseradish and a creamy gluten free sauce

When you’re eating gluten free and you want to try various sauces & flavors, you’ve basically got two choices.  You can either research every brand and their production methods, or you can skip the risks and hassle by making it fresh at home.  While cooking everything is definitely time consuming, it is also a chance to capture the flavors when they are at their peak.

With that in mind, I decided to get some horseradish back on my plate.  I finally got my camera, so I took a couple photos to help demonstrate prepared horseradish and its use in a nice creamy but tangy sauce.

Preparing Horseradish

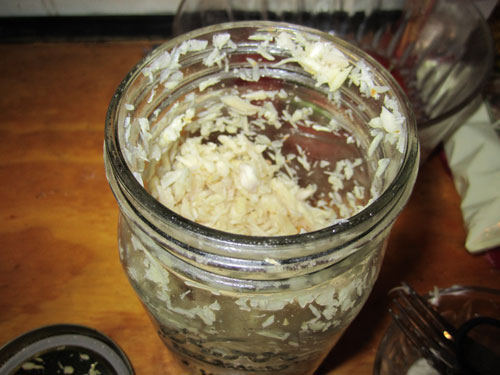
Whole horseradish you can find at the store is a brown dusty root.  Once you peel the barky skin off, cut the remaining spicy pulp in to roughly even chunks.  Take the chunks and put them in a blender with a tiny bit of water (just enough to make it blend!)  The smell is extremely powerful, so you might want to do this outside or in a well ventilated area.  Also, be sure to not touch your eyes or nose when your hands have been working with the root.

Now, when the horseradish is finely shredded, you’ve got to give it a minute or two.  As the flavor molecules interact with the air, the pulp will actually get spicier for up to three minutes before it starts becoming milder again.  The secret to capturing the flavor is to add in some vinegar at the point of the reaction you want to keep.  So about 2 minutes after the blender is done, add in that vinegar and shake it up.

Now you’ve got prepared horseradish!  Chill it in the fridge for up to a month of fresh root, or freeze it for as much as six months.

Creamy gluten free horseradish sauce recipe

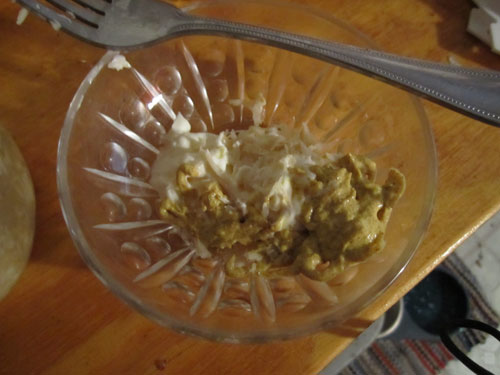
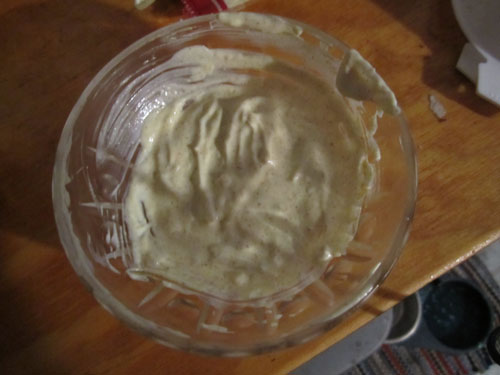
The hard part is done when you’ve got your horseradish prepared.  To make a creamy sauce with some kick, all you have to do is mix about one spoonful of horseradish with about three spoons of mayonaise or sour cream, and a small bit of spicy brown mustard.

Now all you’ve got to do is stir that up and put it in the fridge for a bit!  It definitely tastes great as a dip with steaks and chicken.

Now I understand the obsession with cast iron frying pans

A lot of cooks and kitchen enthusiasts swear by cast iron frying pans – and now I understand why.

From the hand-me-downs I got when moving out to the replacement pans I eventually picked up, everything I could find seemed to be that typical “non-stick” alloy that is actually pretty bad about sticking.  What’s even worse is that you have to baby them or else they’ll scratch and start leeching some stuff that is not so good.  You also can’t heat them up too high or they’ll start to break down in to toxic gasses right under your food.

So by some luck, I found some actual cast iron pans for sale at a convenient location – Wal Mart.  They’re big and black and heavy, but its just iron and it cooks like a dream!

Advantages of a cast iron frying pan:

  • Things really don’t stick – The whole marketing paradigm behind “non-stick” coatings is that they’re supposed to be better than cast iron.  In my experience, it just isn’t true.  Not only can you use metal spatulas, I haven’t seen anything even try to stick to the pan.  Eggs, cheese, even the little burnt drippings of meat that used to be such a pain comes up easily.
  • Its easy to clean up – Since nothing is sticking, clean-up usually involves wiping the surface down with a dry paper towel.  Really, that’s all there is to it.
  • Use it in the oven – Most cast iron pans don’t have a plastic handle or the plastic part is removable so you can use the pan in the oven as well as on the stove top.  You might actually have to make use of your pot holders, but this cast iron pan is very convenient for me when I want to make a pizza!
  • Fry on high – And the other reason you can use cast-iron in the oven is because it can actually tolerate high temperatures better than the non-stick brands can.  I mentioned earlier that the non-stick coatings can break down into toxic gasses at high temperature, but cast iron only breaks down in to … iron!  By the way, iron is one of the essential elements in a human diet, and its responsible for transporting oxygen through the blood stream. Too much can be a bad thing, but toxic overload is still rare at about 1% of the U.S. population.  Just don’t scrub it down and intentionally pull up flakes, right?
  • Better taste and browning – It just tastes better, really.  Not only does the sausage and steak brown just right, but everything has a much fresher taste without those bitter hints I used to encounter every once in a while on the non-stick brands.
  • Comparable price – while there are plenty of premium brands for any type of product, there are also cheap ones available.  The cast iron pan I got is great (I think its a Loge or something)

Downsides of cast iron pans:

  • They’re heavy – The first thing you’ll probably notice when you pick up a cast iron pan is how incredibly heavy they are.  Suddenly, all those comedic sketches of someone getting smacked upside the head don’t seem so funny – someone could really get hurt with this thing.  As an optimist, I just convince myself that this is really an advantage:  the pan doubles as a home defense tool.
  • Seasoning concept can be daunting – I’m still not sure I really understand this “seasoning” concept, but I think the idea is to avoid using hot water and soap when you’re cleaning the thing.  The iron surface kind of like bonds with a layer of cooking oils and food-based fats, so once you’ve used it a few times there is a very nice, slick top for you to do your cooking on.  Most pans are pre-seasoned so all you have to do is maintain it with the proper maintenance.
  • Harder to find – While they seem to be regaining some popularity, it is still much more common to see non stick pans in the kitchen section of most retailers.  I don’t personally like to buy stuff online that I can’t check out in person first, so I didn’t actually get one for myself until it happened to be at a place I was already at.

Now that I’ve been using it for a few weeks, I’m not sure why it took so long for me to get a cast iron pan.  I’ve heard the recommendations before and now I’m starting to see why so many people are singing its praises.

More gluten free pizza crust advice

In the last few months there has been some progress – and some setbacks – in my attempts to make a convincingly real gluten-free pizza.

The basic gluten-free pizza recipe is pretty delicious, but there have been some modifications over time as well, in what I hope to be a process of improvement and refinement.

My first concern was that the crust was too brittle and prone to sticking to the pan.  It tasted fine, but the pizza often came up in broken chunks and had to be re-assembled on the plate.  Then eaten with a fork and knife!

Some of this is because the pizzas I’m making are just DEEP.  Its not quite a tomato pie here, but I do like to go a bit overboard on the sauce, the cheese, and the toppings. My girlfriend had to have some special cheese-free sections to try the pizza (I know, we’re a dietary disaster) and she was interested at first but she can’t take all of those canned tomatoes.  Hopefully in a few more weeks, our backyard garden will start to produce some yield and I’ll be able to try again with fresher produce.

So then I found that corn starch is effective for holding the crust together, but my friend Steve helped me out with some constructive criticism and announced quickly that it “tastes like a microwave pizza.”  And that’s probably a good observation, because I’ve found that those 99 cent microwave pizzas will use a lot of “food starch” without specifying the kind – since corn is just as cheap as or even cheaper than wheat they probably use quite a bit of it to keep their prices down.

When extra corn was ruled out as a solution I decided to try with the Xanthum gum.  Now I don’t know why gluten-free bakers swear by this stuff, but it has the capacity to make bread taste borderline terrible.  Its just gummy.  Who wants bread that tastes gummy?  Next!

Let it sit

So far, the best solution has been to let the dough sit for a much longer period of time.  Wow, that is actually tougher than it sounds.

Ok, so I let the dough sit on the counter (loosely covered) for about six hours, then I stuck it in the fridge and fell asleep.

When I woke up, it had a borderline awful stench of alcohol, but I added some more sugar to it just before rolling it in to my new cast iron pan.  To be safe, I added some sugar to the sauce too – it was going to be a pineapple pizza so the sweetness shouldn’t be a problem and I was honestly way more worried about the bitter alcohol smell coming from way too much fermentation.

But the actual taste and texture of the crust was greatly improved.  Ok, the taste was a good bit harsh, but I’m almost convinced that there’s a happy medium between rolling the dough out immediately and letting it sit for an entire day.  While this makes planning in to a small nightmare, I am pretty confident that the ideal gluten free pizza dough should have about three to four hours rising at room temperature or maybe twice that if chilling out in the fridge.

You might even be able to use more or less yeast to control the rate of reaction, but I really don’t know.   The best piece of advice you’ll ever get in the kitchen is to go ahead and try.  Whether you succeed or fail to produce something delicious, you’ll always be able to tell what there was too much or too little of for an improved attempt in the future.